Friday, 22 April 2011

My Garden

You know the garden I frequently mention?

Well, it is real and here are some photos to prove it.

Self seeded pansys :)


A white dicentra growing over my camomile herd. I think it looks like some strange alien brontosaurus.


A lewisia which survives against all odds every year


My baby ginko tree :)


Part of my strawberry field 

I gave away most of my fruit bushes because I would like to move house sometime in the next 10 months. Here we have (left to right) Tayberry, Gooseberry, Boysenberry, Sunberry and anomous currant.

Gorgeous scented hardy white lillies glad to see them poking up again this year


My first blueberry bushes are flowering merrily :)


My nettle bed of shame :( Need to sort this one out soonish really.


More Dicentra, I love bleeding hearts lol

And so there you are folks, a snippet of my garden. I looks much prettier once everything starts flowering and I know the frosts are over so I put some summer bedding in and stuff :)

Catch you laters

H

Tuesday, 19 April 2011

An interim post

I felt an urge to write a post....

My job as a warehouse troll is mundane, intellectually unstimulating and starving me. However it is giving me huge amounts of time to think and muse. Lots of productive things are coming from my ability to think and the self worth that a monthly wage has granted.

I bought myself an mp3 player on ebay for a bargain basement £36.00 with a 30GB hardrive and a colour screen. I only bought cheap rubbish headphones but it has revolutionised my work experiences. Carrying a 'happy place' in the form of an auditory environment that separates me from the less desirable collegues and something to share with the friendly ones.

I am happiest (in a non Purky workplace) with a set of tasks to achieve that I can work on independently. I plug into my tunes, do the job, set a  time schedule for the day, get it done. Perhaps I am not as much of a people person as I thought?

Purky has pretty much ground to a halt. That makes me sad but I am putting it into hibernation rather than killing it off. I have lots of ideas and as you guys can probably tell, I am having fun exploring new techniques and doing prototyping.

The portfolio is still happening and also another project that was long buried will be resurging. My degree is a BA (HONS) English and Creative Writing....yeah I am a writer! When I bought the MP3 player I also treated myself to a  160GB external hardrive and have raided every pc and laptop that has any of my data on.

Guess what, my short story collection, collated research, photographs, music and such all emerged. I am so very happy to have it back.

So in addition to a Purky portfolio showcasing my artistic and craftwork I will be collating a book of my short stories. My first thoughts are to grab some friends to illustrate it and publish it via a print on demand surface. I will do a limited number and donate 10% of the profits to a stroke charity.

What do you think folks?

Sunday, 17 April 2011

Half arsed sculpting

Yeah, how about that for an inspiring title? Am I sculpting half of an arse? well, no.

I do this thing where I dream about being amazingly talented and I could produce the things I see in my head as fully realised sculpture if I just try. I then also read up on the subject and then take time to procure the materials. I find other things to divert me for a while....in this case I have been imagining this project for about four years?

Four years, that sounds about right. Then I make the worst mistake. I have one go and it is terrible and I put it away and hate myself for being talentless for a few months. Then maaaaybe I have another go and of course because I am NOT PRACTISING it is far from perfect.

Quite irrationally, I make beautiful jewellery items and conveniently forget that my earlier attempts look like a child ate loads of sugar and exploded in a play dough factory. I compare my fledgeling sculpture with my advanced jewellery and berate myself for a lack of talent and vision. Actually I have not got the skills because I need to try more often.

I am a lazy arse who demands perfection from himself without putting in the legwork......New years resolution anyone?

Anyway, heres some pictures because we all like photographs :)


My drawer of tools, collected for the day I would magically 'become' a skillful sculptor.


A big brick of super sculpey, especially purchased because I find other polymer clay very difficult to sculpt with.


Blocking out the shapes


Hmmm, its looks a tad phallic at the moment....


From below, can you tell what it is yet? ..... No it is not an amorpheous mass!!!!!!


Ta da! A 'stylised' (i.e crap) Hare :)


And to demonstrate my inability to sculpt symetrically the other side!!!!


So anyway, this was me playing for half an hour and I got fed up and said Hare is sat on my work desk looking sad. I will return to him/her/it and make an effort to achieve the beautiful fluid stylised shape that I have been imagining and sketching for four years.

For now though, I am going to return to my dreamland of instant successes which helps stave off the realisation I have to go back to work tomorow because my crafty self sufficiency drive has failed.

Toodles!

xxxx

Tuesday, 5 April 2011

Heat embossing on Polymer Clay

Poooom da pom pom da poooooooom!

Well surely a post starting with a ceremonial trumpet solo can only be a good thing?

This is a mini tutorial on one way to do heat embossing on clay :) I use it mainly for when I want a deeper colour/texture effect than mica powders.

Just a quickie before hand though!


Remember my texture plate I hand etched? well muggins here broke it while gouging out the lines to make them more defined. Undeterred I used each half of the plate as a stamp and lined them up!


First gather supplies.

  • A Heat Gun is jolly useful
  • Heat setting ink, versa colour brand here
  • Heat embossing powders
  • A piece of textured polymer clay


Ink up your luck piece of polymer clay, it has already been cured otherwise the powder sticks everywhere! :earned that one the hard way.


Tip over the powder. It will stick to the wet ink. Always place a piece of paper or similarly flexible surface underneath while doing this so you can tip the excess powder back into the jar.


Like so!


I know it looks kinda crusty at this point but have no fear.


Here is a video of me heat embossing in action, sadly I am rather lacking in camera skills and co-ordination when not equipped with a tripod. I think for a normal point and click it is pretty good though.


Here is the finished embossed piece looking all aged and bizzare :)

Friday, 1 April 2011

Texture time

This is really an addition to Studio Saturday but I feel it is momentous enough to have its own post!

This happy fellows are some more texture plates.


From left to right, top to bottom we have....
  1. Plate made from watch gears impressed in clay
  2. Wing charm impressed in clay
  3. Tissue blade and embossing tip
  4. Two police buttons
  5. Military button
  6. Military button
  7. Ornate door pull
 ...and these chappies made brilliant stuff :)


Annoying piece of 'mud clay' but never mind, the pattern is delightful.


How pretty is that? I am dissapointed the teeth of the gears are not more pronounced but there is something for subtlety.


I am going to make more of these 'metal' and 'industrial' styled texture plates ready for a series of sculptures I am going to do later this year.

Thats all for now folks :D

Purky loving

xx

Saturday, 26 March 2011

It is Saturday yet again, fancy a button?

Yoho folks, another odd day in a series of bizare yet mundane weeks.

However, my weekly polymer clay fix is continuing. This is somewhat conducive to my happiness considering I am a professional artist!

I wanted to have another bash at the fractured leaf technique I botched up last week and in doing so I discovered something new!


Exhibit A : A glass baking sheet with some buttons, a bead, a repaired texture plate and a bizzare mobius inspired form.....


Exhibit B: happy button closeups, these are much more satisfying to me than last week's :) Fractured metal leaf tinted with alcohol ink and one textured button.


Now Exhibit C: Features the strange mobius shape. I was forming a round pendant with bevelled edges and decided it was too large so I used a cutter to remove the middle (I ended up discarding it anyway, sigh). I was left with this bizzare ribbon of clay and couldn't stop myself pinching it together and voila!


Ahh serendipity...


With the addition of some trusty waxed cotton cording we have this beauty :) It needs a proper thickness of leather methinks or perhaps suede but it has already survived the 'Clumsy Harry' test of being dropped down the stairs.....I have high hopes for this one.


Saturday, 19 March 2011

Saturday Morning Studio Time!

Hola folks!

You cannot be a glass cannon of artistic ego without actually doing something artistic or creative, otherwise you would simply be a....Glass? Anyway, I bullied myself into the studio this morning despite staying up until 2am watching Comic Relief.


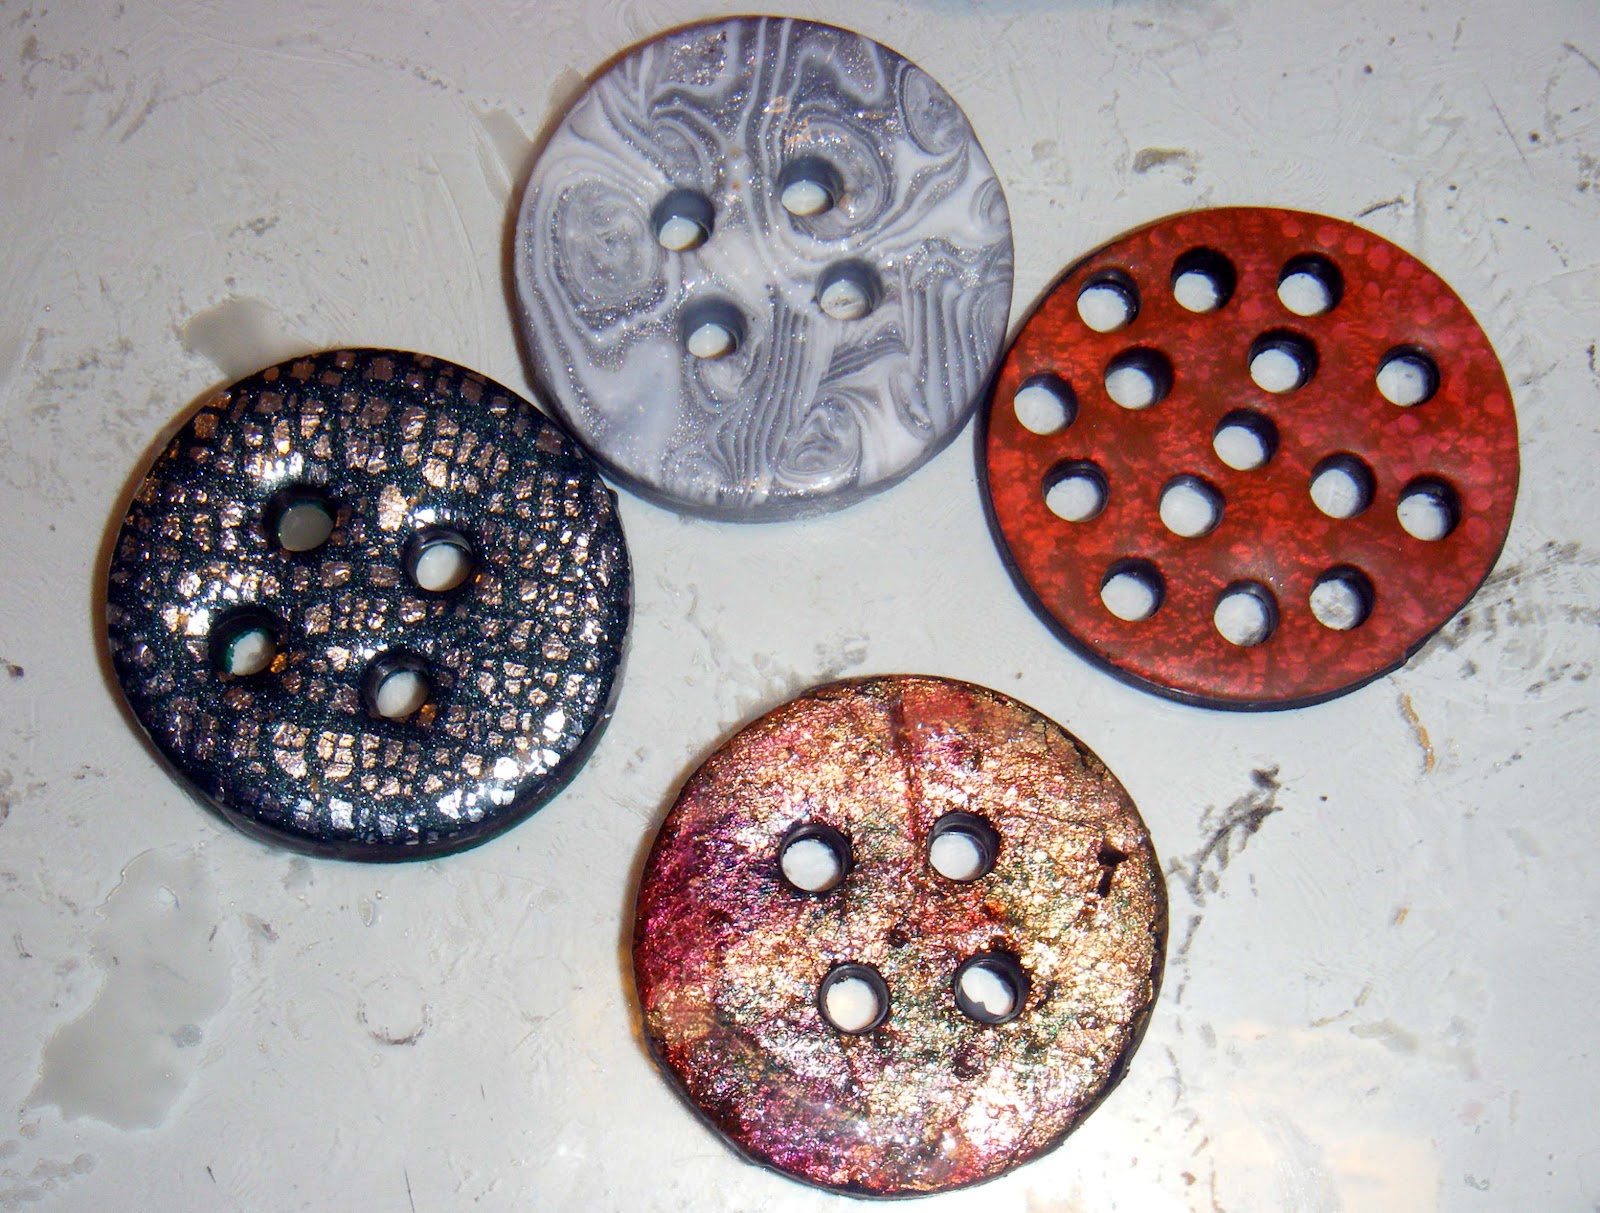
I photographed some bits I have been toying with such as these ginormous buttons.....


Which I am pretty unhappy with to be honest. I messed up the kato liquid glazing and managed to burn the pretty white one with my heat gun. I also mis-spaced the holes on the green one and didn't crackle the gold one enough! In future I will also space the holes on the red style one in a more 'designed' pattern. I was sort of going for a 'shotgun blast' look but not too impressed.

However, lets have a mini tutorial type thing to gloss over some of my flaws :)

Take some scrap clay.....


Abuse it with your Pasta machine until you have a lovely muddy colour and gather a selection of textured implements.....


I personally roll the clay into a sheet of setting number 1 thickness and then fold it over to make a nice thick pad. I also mix it into mud colour so I can see what textures are showing through without the complication of pretty marbled colours...


Dent, I mean texture the clay to produce an interesting sheet. These plate are being made specifically for cufflinks so the majority of the patterns are relatively masculine. Straight lines, rivets etc.


Oh look! Its those pesky buttons again. The bottom plate was made using a large screw and the top one is a cast metal button I found on the floor.


I got into the idea of carving out a sort of flowing leafy wave type pattern but the fimo soft kept 'bobbling' and so I dug out some.....dun de de de dun da daaaa!!!!


Manky old sculpey! which takes texture much more effectively and I should have thought of first.


And so here are out plates. The wonky metal plate, the found button plate, the screw plate, the leafy wave plate and the random plate.

These fellas are baking in my clay oven and I will post what happens with them another time :)

I am off to visit my Mother in hospital later and with any luck may get back in the garden this week.

Much Purky loving and stuff

H